Transferring client files from the prior year
by Intuit•20• Updated 5 months ago
This article will help you:
- Transfer client files from the prior year of ProSeries.
- Transfer client files from the prior year that are stored on a backup.
![]() This article references default installation paths and uses YY to reference the tax year in 20YY format. C: will always indicate the local drive and X: will always indicate the network drive.
This article references default installation paths and uses YY to reference the tax year in 20YY format. C: will always indicate the local drive and X: will always indicate the network drive.
Transferring client files from the prior year
To open the transfer window:
- Open ProSeries 2024.
- From the File menu, select Transfer, then Transfer Clients.
- On the transfer window there will be 5 steps on the left side of the screen:
Step 1: Select the type of files to transfer:
In the dropdown menu, select the types of tax files you need to transfer. The default choice is the type of return you were on when you opened the transfer menu but you can change this to any of the available choices including All 2023 Tax Files to 2024 Tax Files, which will transfer all return types from the prior year.
Step 2: Transfer data files from:
In this step, you should automatically see the prior year's install directory if ProSeries is installed on this same computer. If the data you are transferring is in a non-default location or you are transferring from a backup, click Browse to choose the location of your prior year data files. Once this is correct, you'll see the list of clients on the right side of the screen.
- After clicking Browse next to 2 - Transfer data files from, click Find Files.
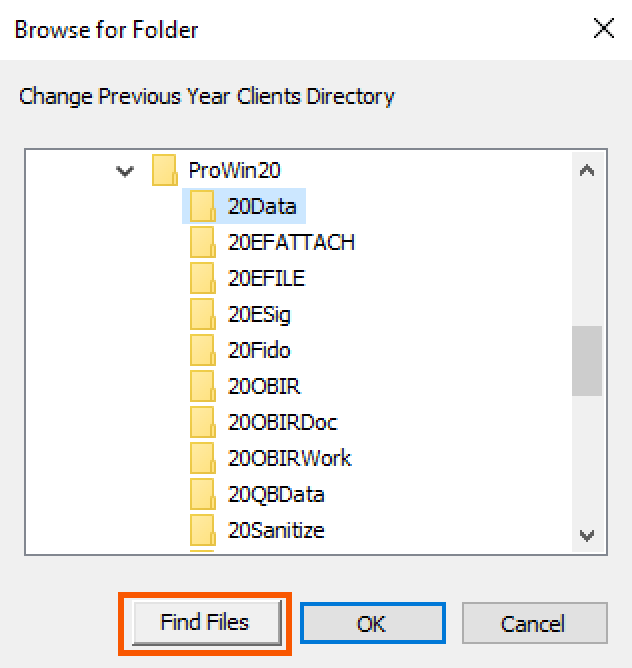
- In the Find Last Year's Files window, click Browse and change the directory to C:.
- Mark the checkbox labeled Include sub-folders.
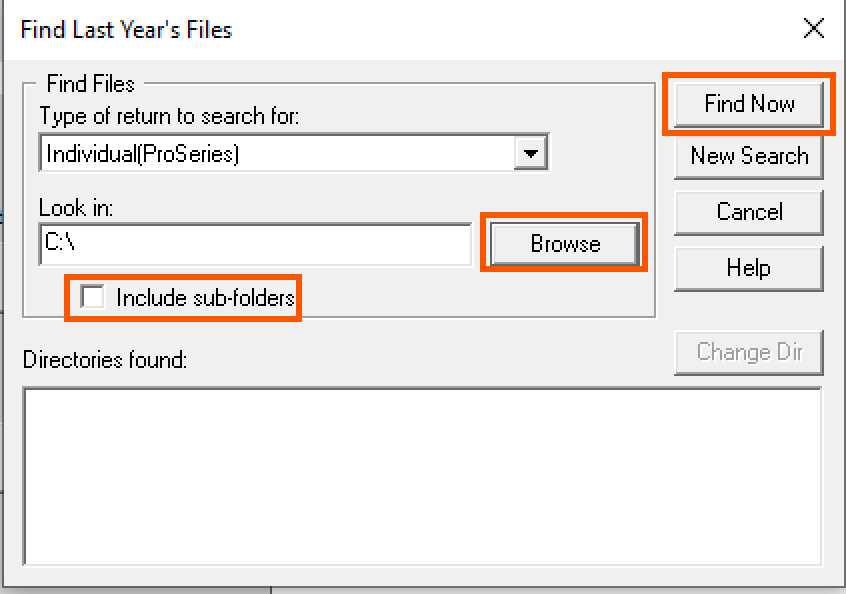
- Click Find Now to find files stored anywhere on that drive computer.
- All locations where client files of the specified type exist will be listed in the Directories Found list. Double-click the appropriate directory.
- Files will appear on the right in the Transfer Clients screen.
- Under 4 - Select clients, click the Transfer button to complete the transfer process.
Step 3: Transfer data files to:
In this step, you should automatically see the current year install directory. If you store your data in a non-default location, click Browse to choose the save location. It's recommended to use the default install location.
Step 4: Select clients:
Use the Select All button if you want to transfer all clients at once, if you want to transfer specific clients hold down the CTRL key while you click on file names on the right side of the screen.
Step 5: Begin transfer:
Click the Transfer button to begin your transfer.
When the transfer is complete you'll see a transfer log that will let you know what client files were successfully transferred, and if there was an error you'll see the error message.
Error: Unable to read the data on your back up:
- This can happen if you're transferring from a backup and the backup is Read Only.
- Create a folder on the desktop.
- Copy clients from the backup location to the folder on the desktop.
- Repeat the transfer using the folder on the desktop instead of the backup media.
Error: File exists but no overwrite allowed
This message occurs when you are trying to transfer a client file that has the same file name as a file that already exists in ProSeries. If this message results for a client that should exist already in the HomeBase, but doesn't show, run Database Maintenance:
Starting in tax year 2020 the Database Maintenance tool has been replaced with a new and improved HomeBase Maintenance tool. For details on the change, see here.
To run HomeBase Maintenance in ProSeries 2020 and newer:
- Go to HomeBase and change your Homebase View to the main view impacted such as the Form 1040: Individual.
- HomeBase Maintenance is not available on special views such as the All Tax Return view, EF Center, or Pay-by-Refund
- From the HomeBase menu, select HomeBase Maintenance.
- Let it run! HomeBase Maintenance will fix any issues it encounters automatically.
To run DataBase Maintenance in tax year 2019 and prior:
- Go to HomeBase and change your Homebase View to the main view impacted such as the Form 1040: Individual.
- HomeBase Maintenance is not available on special views such as the All Tax Return view, EF Center, or Pay-by-Refund
- From the HomeBase menu, select Database Maintenance.
- Verify the correct folder is selected for your client files, then click OK.
- If there are inconsistencies between your Homebase database and client data files are found, the HomeBase Reconciliation dialog box will appear.
- Click Show Details to view a list of files in each category.
- Click Fix It to synchronize your client files and HomeBase.
- Click Help for more information about the HomeBase Reconciliation dialog box.
- Click Recheck to ensure that you have fixed any inconsistencies.
- Click Close.
- To perform maintenance on a different view, such as 1120 or 1065, select the view and repeat the above steps.
If you wish to transfer and overwrite the existing client file you can change the program settings to allow this. Once a client file is overwritten, the data existing before the transfer can't be recovered.
- From the HomeBase menu, choose Tools then Options.
- Choose Transfer from the left side of the screen.
- Check the box that says Overwrite Existing Client Files.
- Click the OK button.
- Transfer the client again.
This article covers transferring prior-year files to the current year. If you need to transfer current-year files to another current-year program, refer to this article for instructions instead.
Follow these steps to transfer ProSeries Professional clients to ProSeries Basic:
- Open ProSeries Basic.
- From the File menu, select Transfer and choose Transfer Clients.
- For 2 - Transfer data files from..., click on Browse.
- Locate and open for the ProWinYY folder.
- Highlight the YYdata folder, then click OK.
- Wait for your clients to appear in the white area of the screen.
- Click Select all for 4 - Select clients.
- Click Transfer for 5 - Begin transfer.
Your clients will now appear on the HomeBase of ProSeries Basic.
Follow these steps to transfer ProSeries Basic to ProSeries Professional clients:
- Open ProSeries Professional.
- From the File menu, select Transfer and choose Transfer Clients.
- For 2 - Transfer data files from..., click on Browse.
- Locate and open for the BasWinYY folder.
- Highlight the YYdata folder, then click OK.
- Wait for your clients to appear in the white area of the screen.
- Click Select all for 4 - Select clients.
- Click Transfer for 5 - Begin transfer.
Your clients will now appear on the HomeBase of ProSeries Professional.
Related topics
You must sign in to vote.
Sign in now for personalized help
Ask questions, get answers, and join our large community of Intuit Accountants users.
More like this
- Program options that transfer from the prior year of Lacerteby Intuit
- How to transfer prior-year ProSeries Fixed Asset Manager clients to the current yearby Intuit
- Common questions about the ProSeries Tax History Reportby Intuit
- Asset Entry Worksheet didn't transfer from the prior year in ProSeriesby Intuit
