eSignature is conveniently integrated within Lacerte. For common eSignature questions, click here.
Table of contents:
Accessing the eSignature dashboard
eSignature for Lacerte comes with a dashboard to cleanly and concisely manage your eSignature requests. Here's how you can access it:
Option 1
- Click on the eSignature Dashboard icon

Option 2
- Click on the eSignature Dashboard tab

Option 3
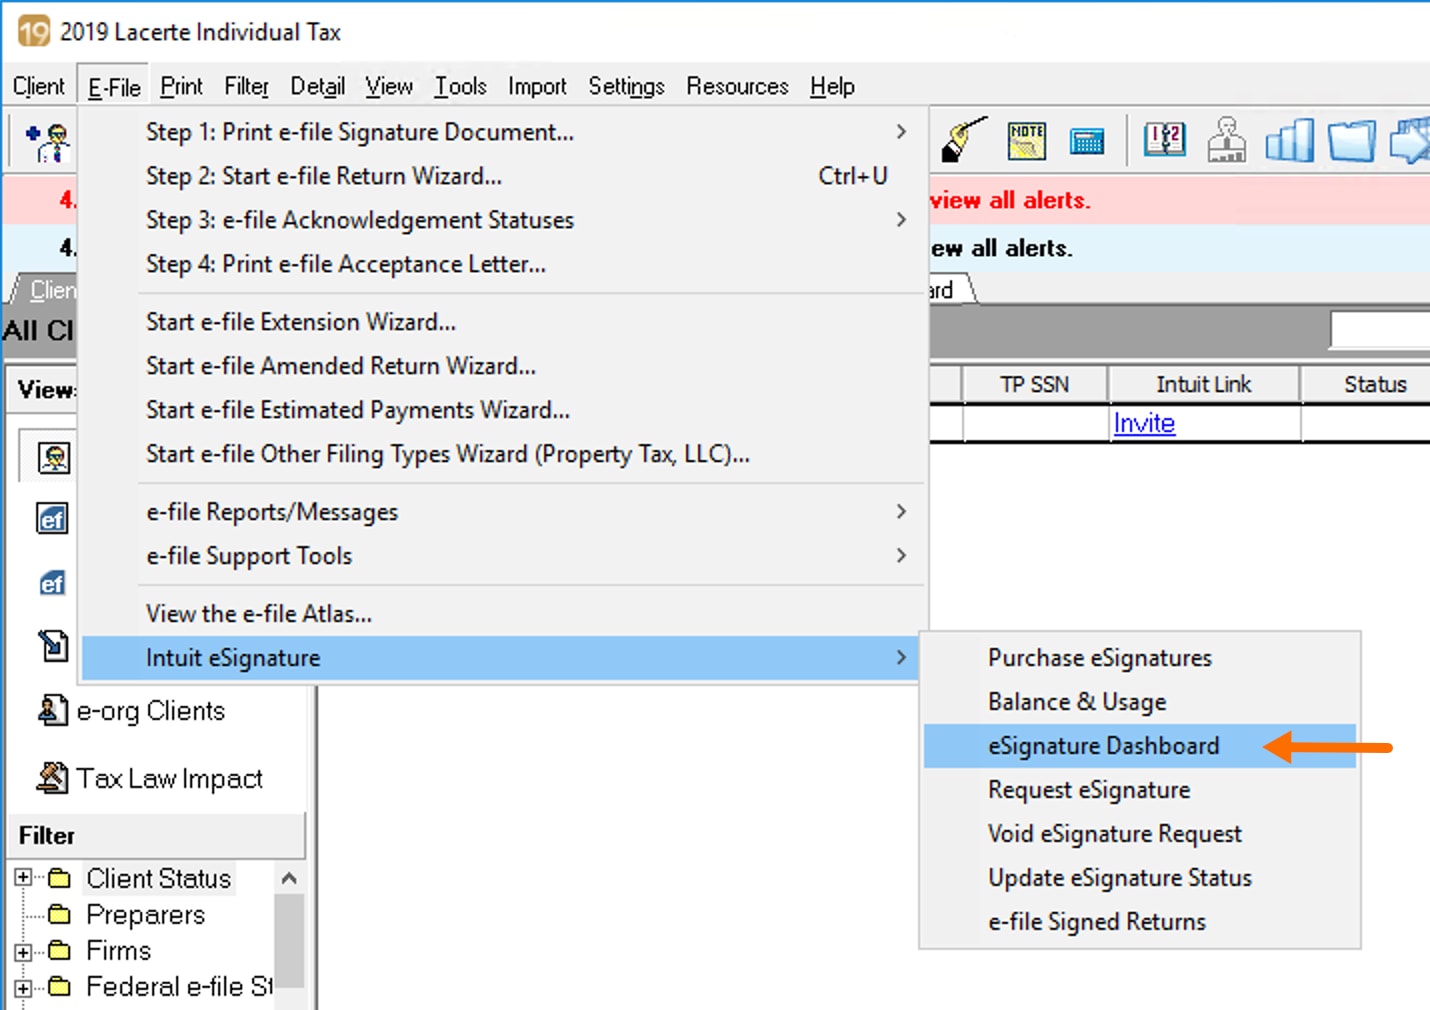
- Go to the E-File menu.
- In the dropdown menu, select Intuit eSignature and then click on eSignature Dashboard.


eSignature free-trial offer details
- Navigate to the eSignature dashboard.
- From the left navigation panel, select How it Works.
- Click Start Trial. Since the trial is available to new eSignature customers only, this button may not be present for all users.
- If prompted, enter your login credentials.
Purchasing eSignatures
- Click the eSignature Dashboard tab.
- From the left navigation panel, select Purchase eSignatures.
- Choose Bundle, Unlimited, or Pay as You Go
- For Bundle or Unlimited, enter your Credit Card Information.
- Pay as You Go adds a charge to your next billing statement.
- Click Continue.
- Verify your information on the Preview Order screen and click Continue.
- On the Confirmation screen, you will see your Order Number.
- To return to the eSignature dashboard, click Continue.
![]() Because an eSignature purchase is neither refundable nor transferable—meaning they don't carry over to another tax year—it's advisable to purchase only what you need for the current tax season. Purchases made in the current year can be used for prior-year returns.
Because an eSignature purchase is neither refundable nor transferable—meaning they don't carry over to another tax year—it's advisable to purchase only what you need for the current tax season. Purchases made in the current year can be used for prior-year returns.
Creating email templates for eSignature requests
Create and save multiple email templates to send with client eSignature requests. Or, send specific email messages to subsets of clients, then save them as templates for later use.
To create your custom eSignature email template:
- Go to the E-File menu.
- Select Step 1: Print e-file Signature Document and then Request eSignature in the dropdown menu.
- Select the documents that require an eSignature and click Next.
- Here you can delete or view any document you want to send to your client. Click Next to continue to the Recipients screen.
- In the Email message bar, click the gear icon.
- In the Email templates pop-up window, you can add new email templates, edit, or delete existing templates.
Sending eSignature requests
In order to send an eSignature request to a remote client:
- Under the Clients tab, highlight the client.
- In the E-File menu, go to Intuit eSignature and select Request eSignature.
- The standard tax forms will be displayed. By default, a copy of the client's return is automatically included in every request. If you don't want to include a copy of the tax return, uncheck the box Include Client Copy of Tax Return.
- Click Next to be taken to the Request eSignature screen.
- Here you can delete or view any document you want to send to your client.
- For instructions on adding documents, see the "Sending a request with additional documents" section below.
- When you're satisfied with the list of documents, click Next to continue to the Recipients screen.
- Review your client's name and email address for accuracy, and edit the email message they'll receive, if needed.
- Click Next to continue to the reminders and expiration options.
- Check the box next to any reminders you want to send, and press Next to review your request.
- Once you're satisfied with the request details, click Send.
To send an in-person eSignature request:
If you're going to meet with your client in person, you can simplify the signature process by creating the eSignature and having your client sign it on the same computer.
- Highlight the client on your clients list.
- In the E-File menu, go to Intuit eSignature, and select Request eSignature.
- Select the forms for which you need signatures, then click Next.
- Click Next to be taken to the Request eSignature screen.
- When you're satisfied with the list of documents, click Next to continue to the Recipients screen.
- in the gray TaxPayer bar, select the In-Person option
- Enter the name of the appropriate preparer or firm employee in Name of the person collecting eSignature.
- Click Next to continue to the reminders and payment screen.
- When you're satisfied with your selections, click Next.
- Review your selections on the summary screen, then click Send.
- Once your client is ready to sign, locate them on your eSignature Dashboard.
- Note: Their status will be Pending In-Person.
- Click Collect Now in the action column.
- You'll receive a message that you'll now be taken to DocuSign to collect the signature. Click Ok to continue.
- If the request has multiple recipients, select the person who will sign first, then click Ok.
- DocuSign will open in your web browser. Read the instructions, then click Start.
- Next, give your client control of the computer. Your client should:
- Check the box labeled I agree to use electronic records and signatures.
- Sign the document, then click Finish.
- Enter their email address to request a copy of the completed document, or press Print for a paper copy.
- Click Continue.
- Click Continue once more to pass control back to you.
Once these steps are completed, you can refresh your eSignature dashboard to update the request status. If there is only one recipient, the status will change to eSignature Completed. If the request has multiple recipients, like an MFJ return, you can have the second person sign now. Just click Collect Now and follow the steps in this section beginning with step 9.
Sending a request with no watermark on the Client Copy
After a tax year 2020 Lacerte program update, you can remove the “Do Not File” watermark on the Client Copy of the tax return when using eSignature.
- Select a client and then go to the E-File menu.
- Select Intuit eSignature and then Request eSignature from the dropdown menu.
- On the eSignature Forms screen do one of the following:
- Select Watermarked to include a “Do Not File” watermark on the Client Copy. This option is selected by default.
- Select Non-watermarked to remove the “Do Not File” watermark on the Client Copy.
- Click Next to continue.
- You can preview the client copy of the tax return on the next screen by clicking View in the in the Actions column.
- Proceed with sending the eSignature request.
Sending a request with additional documents
Before you start:
- Verify the tax return is set up for e-filing on Screen 1.
- Make sure you've completed the return and resolved all critical diagnostics.
- Starting in tax year 2020, the IRS permits electronic signatures on Forms 2848 and 8824.
To send the request:
- Under the Clients tab, highlight the client.
- In the E-File menu, go to Intuit eSignature and select Request eSignature.
- The standard tax forms will be displayed.
- By default, a copy of the client's return is automatically included in every request.
- If you don't want to include a copy of the tax return, uncheck the box Include Client Copy of Tax Return.
- Click Next to continue.
- Click on Start a request to continue to the Request eSignature screen.
- Here you can add, delete, or view any document you want to send to your client.
- To add a document, choose the document type from the dropdown menu, then click Browse to select a PDF from your computer.
- The dropdown option Reference document doesn't require a client signature.
- When you're satisfied with the list of documents, click Next to continue to the Recipients screen.
- Review your client's name and email address for accuracy, and edit the email message they'll receive, if needed.
- Click Next to continue to the reminders and expiration options.
- Check the box next to any reminders you want to send, and press Next to review your request.
- Once you're satisfied with the request details, click Continue to DocuSign so you can insert signature tags on the 'other' documents as needed. A new tab will open that displays the documents you included.
- The documents will be listed on the right-hand side of the page. Select the 'other' document you manually attached.
- Drag and drop the Signature tag(s) located on the left side of your screen to the signature location(s).
- Click the Send button to send the request to your client.
To view and download completed eSignature documents
To view your completed documents:
- Click on the eSignature Dashboard tab.
- Click on Ready to e-file on the Action required card at the top of your screen. Only clients with completed eSignatures will be displayed.
- You can search for a specific client by using the search by client name field and typing in the client's name or email address.
- When all documents are signed, the eSignature status column will show eSignature Completed. To view the signed documents, click the dropdown menu on the Actions column and select View.
- Choose the PDF you wish to view.
To download your completed documents:
- To download documents, click Download under the Actions column.
- Select a local folder or network folder in which to save the .zip file.
- Type the name of the file or elect to keep the default name.
- The default format for the name of the file is esign-documents-Client#.zip.
- Click Save.
Canceling an eSignature request
There are two ways to cancel an eSignature request.
Option 1
- Go to the eSignature Dashboard.
- Locate the client from the list.
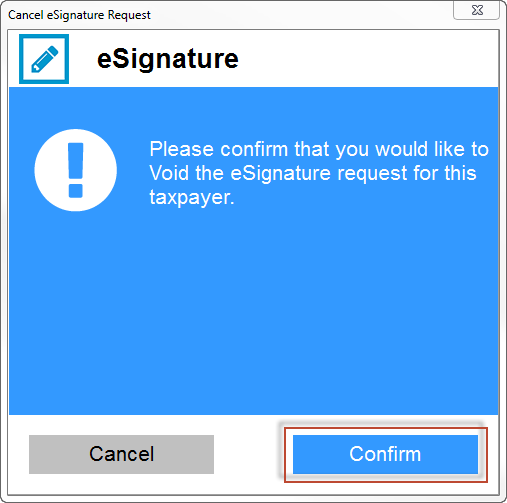
- In the Actions column, select Void Request.
- In the Cancel eSignature Request window, click Confirm.
Option 2
- Under the Clients tab, highlight the desired client.
- From the E-File menu, navigate down to Intuit eSignature.
- Select Void eSignature Request.
- On the Cancel eSignature Request window, click Confirm.
Editing an existing eSignature request: Coming Soon!
On the eSignatutre Dashboard you can now use Edit to modify an eSignature request after it's been sent. This lets you to change what's in the eSignature request without using an additional eSignature credit. You can change:
- Text in the email sent to the recipient
- Remove no longer needed forms.
- Add new federal or state forms.
- Send updated forms
This does not allow you to edit eSignature Payment Requests.
Edit is available for eSignature requests based on their Status. The following chart will show you if the request is editable:
| Status | Description | Editable |
|---|---|---|
| Sent | The request has been successfully sent. | Yes |
| Delivered | The recipient has opened the request and has logged into Docusign, but has not yet been signed. | Yes |
| In-Process | The request is being setup but has not yet been sent to the recipient. When your ready to continue, select the Resume option. | No |
| eSignature completed | All the recipients signed and returned the eSignature process. | No |
| Partially signed | One of the recipients signed and returned the eSignature process. | No |
| Declined | The recipient declined the eSignature request. A new request can be sent. | No |
| Expired | The eSignature request expired before the recipient took the requested action. A new request can be sent. | No |
| Authentication failed | The recipient failed the autentication check. A new request can be sent. | No |
| Voided | The eSignature requested was Voided. A new request can be sent. | No |
| Pending In-Person | The eSignature is setup for in person signing and has not yet been completed. | Yes |
| Expires in # days | The eSignature request was sent but the recipeint has not completed the request. If not completed in the specified time the request will expire. | Yes |
Adding a secondary email address to receive eSignature confirmations
eSignature can add a secondary email address to receive notifications when a client completes a request. Before this change, email notifications were sent only to the individual who initiated the request.
To add a second email address to receive eSignature confirmations, follow the step below:
- Click on the eSignature Dashboard tab and then select How it works on the left panel.
- On the bottom of the screen, click Add Email.
- Click the dropdown arrow to select an email address to receive notifications.
- Click the Add button and then OK.
