This article will help you with common tasks in the Intuit Link online portal.
Follow these steps to download chat logs, messages, and comments from Intuit Link:
- Sign in to Intuit Link.
- Select the Client Name to open Client Details.
- Above the list of requests, select Download Responses (.csv) file.
How do I sign up to receive notifications?
You can turn on email notifications for client activity. These emails are sent around 6 AM and will let you know if one or more clients were active in the prior day.
To change your notification preferences:
- Select Firm Settings in the left panel.
- Go to the Client Activity Emails section.
- Make your wanted changes. To opt in, slide the bar over to the left. To opt out, slide the bar over to the right.
- Select Save.
![]() To receive the daily notifications on multiple email addresses, select Add Another and enter the additional email address. There is no limitation on the number of email addresses that can be added.
To receive the daily notifications on multiple email addresses, select Add Another and enter the additional email address. There is no limitation on the number of email addresses that can be added.
To view the active clients:
- Select View Client's Activity.
- This will take you to the Link Overview page where the client list will be sorted by Last Activity.
- To view the client's responses, select Review under the Actions column.
How do I create Request Templates?
![]() Templates created on the website don't integrate with the Lacerte or ProSeries desktop programs. To use a template that's created on the website, first invite the client to Intuit Link from the desktop program.
Templates created on the website don't integrate with the Lacerte or ProSeries desktop programs. To use a template that's created on the website, first invite the client to Intuit Link from the desktop program.
To make a copy of a sample template:
Intuit Link has sample templates that you can use to send out to your clients or you can make a copy and then modify it to suit your needs.
![]() The sample templates can't be modified, but you can make a copy of any of the three samples and then make modifications to the copy.
The sample templates can't be modified, but you can make a copy of any of the three samples and then make modifications to the copy.
To make a copy of the sample template:
- Go to the Request Templates tab.
- You'll see three sample templates: Individual, Partnership, and S-Corp.
- Select the sample template you need a copy of.
- Select the copy icon.
- You may also scroll down to the bottom of the page and select Copy.
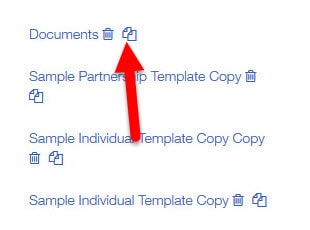
- You may also scroll down to the bottom of the page and select Copy.
- You'll then see a copy of the sample template. Select in the Template Name field to change the name of the template.
To modify the questionnaire:
- To modify the questionnaire description, click inside the field and enter the desired text.
- To change the question type, select the dropdown arrow and select either Open Ended or Yes or No.
- To delete a question, select the trash icon.
- To add a new question to the questionnaire, select Add Question at the bottom of the questionnaire list.
To modify document requests:
- To modify the description of the document request, click inside the field and enter the desired text.
- To delete a document request question, click the trash icon.
- To add a new document request, select Add Document Request at the bottom of the Documents list.
How do I lock responses completed by the client?
You can lock requests that the client has completed. Once a request is locked, the client won't be able to change their responses.
![]() You can only lock items that have been completed by the client.
You can only lock items that have been completed by the client.
To lock a response:
- Find the desired client on your Client List.
- Select Review in the Actions column.
- Find the request(s) you want to lock and prevent the client from changing their response.
- Hover over to the column with a lock icon and check the box.
- To unlock the request, uncheck the box.
When a response is locked, the request will be unavailable on the taxpayer's portal and the taxpayer won't be able to change their response. Locked questions will have a green checkmark and will have the following text: Accepted by your tax professional. See the image below for the taxpayer view.
How do I create custom email templates?
![]() Email templates created on the Intuit Link portal won't be available when requesting client data via Lacerte or ProSeries.
Email templates created on the Intuit Link portal won't be available when requesting client data via Lacerte or ProSeries.
Follow these steps to create custom email templates:
- Select Firm Settings in the left panel.
- Go to the Email Templates tab.
- Select New Template.
- Give your template a title, subject, and type the desired text in the Email Body section.
- You can use tags as a placeholder in your letter for the client name and your firm name. The tag is replaced with your client's name. The same goes for the Firm Name tag. The tag is replaced with your actual firm name.
- Select Save.
- Repeat the steps above to create additional templates.
Now when you send an invitation, a request for data, or a reminder to your clients, you can select the appropriate template from the Templates selection menu.
