This article will assist you with managing folders in Document Management System (DMS).
Table of contents:
Creating new folders for all clients in DMS
You can create new folders or subfolders in DMS for new clients or all existing clients. If you have duplicate folders or folders that are incorrect, call our Technical Support group for help.
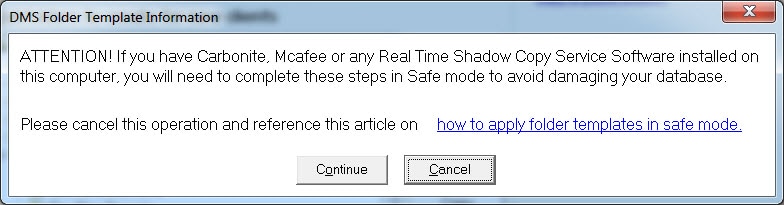
- Follow these steps as well if, after updating to the newest version of DMS, you don't see any template folders for the new tax year.
- The problem occurs if you click Cancel in the Attention! pop-up window during the update.
Make sure you have backed up your DMS database to an external drive before following the steps below.


Follow these steps to use the Folder Template feature in DMS for multiple clients:
- From the Tools menu, select Options.
- Go to the Folder Templates tab.
- Select Yes or No to the question Do you want to apply changes to ALL clients?
- Selecting Yes will make these folders appear for existing clients as well as new clients.
- Selecting No will make these folders apply only to new clients.
- In the Subfolders to create for new clients section, select the location for the new folder.
- Click the Add button.
- Enter a name for the new folder and press Enter.
- Repeat steps 4-6 to create additional folders.
- Click OK to save your changes.
![]() You can also drag/drop the folders that are in the Subfolders to create for new clients section. Click on the folder you want to move, drag to the location where you want to move it to, and release the mouse key.
You can also drag/drop the folders that are in the Subfolders to create for new clients section. Click on the folder you want to move, drag to the location where you want to move it to, and release the mouse key.
Additional functions available while in the Folder Templates tab
- Rename - Renames an existing folder.
- Delete - Deletes an existing folder.
- Cut - Cuts a folder and places it in the clipboard.
- Copy - Copies a folder and places it in the clipboard.
- Paste - Paste a folder from the clipboard.
To copy subfolders into a new folder using copy and paste:
- In the Subfolders to create for new clients section, highlight the sub-folders underneath the previous tax year folder and click the Copy button to the right.
- In the same section, highlight the main Client folder at the top of the file tree and click the Add button to the right.
- Type in TY23, and press return.
- Make sure TY23 is still selected and click Paste.
.png)
Follow these steps to create a folder for one client from the Client Selection screen:
- In Clients, select the client that you want to create the folder for.
- From the File menu, select New and choose Subfolder.
- Type in the name of the new folder and press Enter.
How to create custom folder separating client and PDF file
![]() DMS must be installed with no default data paths.
DMS must be installed with no default data paths.
- Open Lacerte and go to Settings and open Individual user options.
- Select Setup tab & select Complete Return - DMS from the left.
- Under Complete Return - DMS select DMS Destination Folder.
- Here is where it needs to only indicate Client Folder no 2023\tax Returns folders are present.
- Once the DMS folder module opens up, click the mouse under the name in the clear field area. This will get rid of extra folders in Lacerte's DMS Destination Folder.
What to do if you are getting duplicate tax year folders
DMS, like Windows, normally will not allow two folders with the same name to exist in the same location. Duplicate tax year folders such as TY2022 or TY2023 are created because the original folder was not named exactly like the one the tax program is creating by default.
For example, the folder that was manually created might be ty2022, TY2022 or TY 2022. All three are common examples of folders that might be manually created and duplicated by the tax program because they do not match the default name of TY2022.
If you have not added files to the manually created folders, they can be removed be deleting them from the folder template settings of DMS. If you have been saving documents to the manually created folders, it may be simpler to reset the tax program to use that folder instead of the program's default. Then the DMS template tool can be used to remove the empty default folders.
Removing Folders From the Template
- Click Tools, followed by Options and the Folder Templates tab on the DMS menu bar. The template window will open.
- Click the folder you wish to remove in the folder tree. It will be highlighted and the option to Delete it will become available on the right side of the folder tree.
- Click Delete followed by the OK button to remove the folder.
- Note: The message reminding you folders that contain a document will not be deleted.
Resetting DMS Folder Options in Lacerte
- Click the Settings menu followed by Options and select the Setup tab.
- Locate and click Complete Return - DMS on the left side of the window to bring that section to center focus.
- Note: You will need to browse to the desired folder to replace the currently set default. The current entry can not be edited.
- Click the Browse button, (the button with 3 dots) to the right of the DMS Destination Folder entry. A DMS Select Folder window will open.
- Highlight the folder you wish to use by double clicking it followed by the Tax Returns folder if it was also created.
- Clicking OK will finalize your selection in the browse window. Clicking the remaining OK will complete the process.
Resetting DMS Folder Options in ProSeries
- Click the File menu and select Print Options. The Print Center window will open.
- Click Printer, PDF, and DMS Setup located on the left side of the window in the list. The main view of the window will change and the DMS Browse button will be the last item on the right side.
- Click the Browse button. A DMS Select Folder window will open.
- Highlight the folder you wish to use by double clicking it followed by the Tax Returns folder if it was also created.
- Clicking OK will finalize your selection in the browse window. Clicking the remaining OK will complete the process.
