This article will help with setting up SmartVault in the hosted environment and basic SmartVault troubleshooting.
Table of contents:
Installing SmartVault
- Use the red Logoff button on your remote desktop to sign out of the hosted environment, and have any other users in your firm for whom you're installing SmartVault sign out, too.
- If you are missing this icon, or can't get to it, right-click on the Start/Windows icon in the hosted environment, select Shut down or sign out, and choose Sign out.
- Users with the User (no catalog) role will need the Account Owner or someone with the Account Admin role to install apps for them.
- Sign in to the Rightworks AppHub.
- Select My Apps.
- Scroll down to the Available Applications section and locate SmartVault.
- Select Install.
- The installation will begin, and when it's complete, you'll see SmartVault in the Installed Applications section.
- If you are the Account Owner or Account Admin and also want to install the new year for your other users:
- Select the Admin Console.
- Go to the Users tab.
- Click on the name of the user to be taken to their Apps screen.
- Scroll down to the Available Applications section and locate SmartVault.
- Select Install.
- The installation will begin, and when it's complete, you'll see SmartVault in the Installed Applications section.
- Select All Users in the upper left to quickly get back to your list of users if you need to repeat to install for additional users.
When you next login to the hosted environment, you'll see the SmartVault shortcut on your desktop.


Setting up SmartVault to automatically start when you access the hosted environment
To have SmartVault automatically open when you sign in to the hosted environment, the shortcut needs copied into your Windows Startup folder. Each user has their own unique H:\ drive, so each user who wants SmartVault to autostart would want to follow these steps:
- Open File Explorer in the hosted environment.

- Select This PC.
- Open the H:\ drive, and then the Desktop folder inside.
- Copy the SmartVault shortcut.
- You can use Ctrl+C (keyboard shortcuts work by default in the hosted environment when it's maximized) or select the Home tab in File Explorer and use the Copy button.
- Browse to H:\Start Menu\Programs\Startup.
- Paste the SmartVault shortcut.
- You can use Ctrl+V or select the Home tab in File Explorer and use the Paste button.
- Logoff using the red logoff button, and then sign back in to the hosted environment to confirm SmartVault autolaunches.
- If you are missing this icon, or can't get to it, right-click on the Start/Windows icon in the hosted environment, select Shut down or sign out, and choose Sign out.
Adding the Outlook SmartVault Plug-in
The Outlook Plug-in for SmartVault allows users to send, receive, and manage documents securely inside of Outlook.
If you want this plug-in, call to speak with an Intuit Hosting expert.
For more information on how to contact Lacerte, as well as our operating hours, see here.
For more information on how to contact ProSeries, as well as our operating hours, see here.
Setting up SmartVault to integrate with your tax software
Lacerte and ProSeries can integrate with SmartVault, but you'll need to set SmartVault to integrate your tax software, and then grant access to SmartVault when your tax software prompts to confirm.
- Close your tax software in the hosted environment.
- Open SmartVault.

- If you are not already signed in you'll be prompted to sign in to SmartVault.
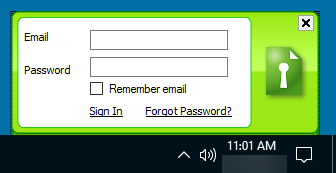
- Use the email and password for your SmartVault account.
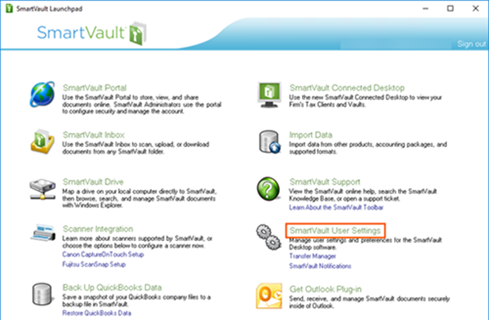
- You'll need to open SmartVault again after signing in to get to the SmartVault Launchpad.
- If you are not already signed in you'll be prompted to sign in to SmartVault.
- From the SmartVault Launchpad, select SmartVault User Settings.
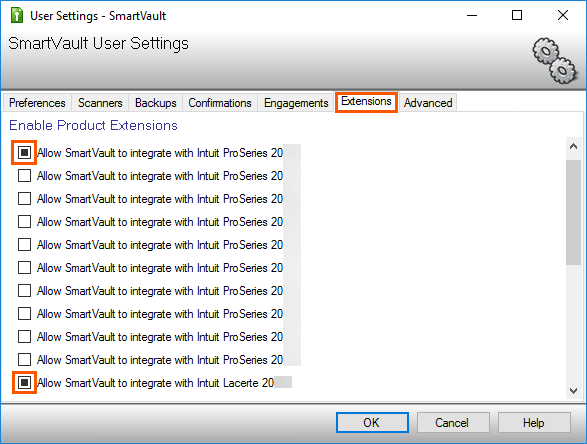
- Select the Extensions tab and check the box for each tax product's year(s) that you want to use SmartVault.

- If the checkbox has a solid box, click the box once to clear it, and then check the checkbox.
- If the checkbox has a solid box, click the box once to clear it, and then check the checkbox.
- Select OK.
- You can close the SmartVault Launchpad if wanted.
- Open your tax software, you should be prompted with an Access Confirmation screen asking if you want to grant SmartVault access to your tax software. Select Grant.
- You may be prompted with this request before you open the tax software.
- You should receive a prompt for each tax product/year checked.
- Once access to SmartVault has been granted, confirm the SmartVault checkbox is present when when printing a return from your tax software.
Setting up SmartVault Drive
- Close your tax software in the hosted environment.
- Open SmartVault.
- If you are not already signed in you'll be prompted to sign in to SmartVault.
- Use the email and password for your SmartVault account.
- You'll need to open SmartVault again after signing in to get to the SmartVault Launchpad.
- If you are not already signed in you'll be prompted to sign in to SmartVault.
- From the SmartVault Launchpad, select SmartVault Drive.
- You will be prompted to Select the drive letter to use, Z:\ is recommended.
- Enter the email and password for your SmartVault account and select OK.
- File Explorer will launch taking you to the mapped SmartVault drive in the hosted environment.
SmartVault Updates
When an update for SmartVault is released, Rightworks works with SmartVault, testing the update to confirm it works in the hosted environment before implementing the update during the following weekend after testing is completed.
If you are missing the checkboxes to integrate the new year for the tax program in SmartVault, you will need to wait until the update is available in the hosted environment.
Troubleshooting SmartVault in the hosted environment
Before you begin troubleshooting SmartVault, we suggest doing the following:
- Use the red Logoff button on your remote desktop to sign out of the hosted environment, and then sign back in to see if you still have the issue.
- If you are missing this icon, or can't get to it, right-click on the Start/Windows icon in the hosted environment, select Shut down or sign out, and choose Sign out.
If this does not fix your issue and it's not covered in this article see the SmartVault Help Center or reaching out to SmartVault support (SmartVault Contact Us) for guidance on troubleshooting steps needed.
SmartVault sometimes advises users to clear a couple of folders to troubleshoot different issues. The location of these folders in the hosted environment are:
- PTDesktop
- H:\Settings\Users\*\Application Data\Local\Intuit\PTDesktop\PendingPrintJobs\SmartVault (where * is a number assigned to you as a Intuit Hosting user)
- To see the Settings folder on the H:\ drive select the View tab in File Explorer and check Hidden Items.
- H:\Settings\Users\*\Application Data\Local\Intuit\PTDesktop\PendingPrintJobs\SmartVault (where * is a number assigned to you as a Intuit Hosting user)
- Cache
- H:\Application Data\SmartVault\Cache
Printing to SmartVault appears successful but the document is not appearing
If you are printing to SmartVault from you tax software and it appears to print successfully but you're not seeing the document in SmartVault, test to make sure you can successfully print to PDF from your tax software, saving it in the hosted environment (on the I:\ or H:\ drive) to narrow down the issue.
If you can't print to PDF:
- Use the red Logoff button on your remote desktop to sign out of the hosted environment, and then sign back in to test printing again.
- If you are missing this icon, or can't get to it, right-click on the Start/Windows icon in the hosted environment, select Shut down or sign out, and choose Sign out.
If you can print to PDF:
- Run the SmartVault Fix Printer Driver Configuration tool:
- Select the Show hidden icons arrow ^ in the system tray near the date/time.
- Right-click on the SmartVault icon, go to Actions, and select Fix Print Driver Configuration.
- Then right-click on the SmartVault icon and select Exit.
- Close hosted by double-clicking the red logoff button.
- Go back into the hosted environment and test printing to SmartVault again.
- Clear the SmartVault cache folder:
- Save and close all SmartVault files.
- Click the arrow up in the lower right of the Windows taskbar and right-click on the SmartVault icon and choose Exit.
- Browse to H:\Application Data\SmartVault\Cache and delete the contents of the cache folder.
- Ctrl+A can be used to highlight all files in a folder, then the Delete key can be used to delete all highlighted files/folders. The default is that keyboard shortcuts will work in Intuit Hosting when the Rightworks environment is maximized.
- Alternatively, File Explorer's Home tab has buttons for Select all and Delete.
- If some files cannot be deleted, logoff using the red Logoff button, then sign back in and delete the remaining contents.
- Browse to H:\Settings\Users\*\Application Data\Local\Intuit\PTDesktop\PendingPrintJobs\SmartVault (where * is a number assigned to you as a Intuit Hosting user) and delete the contents of the SmartVault folder.
- If you're trying to print to more than one thing at the same time, try printing to just SmartVault. The tax software will sometimes have an issue printing to more than one type of PDF at the a time.
- If you're still having the issue, check to see if the PDF did go to SmartVault but is in a different folder than you expected.
Lacerte or ProSeries is missing the checkbox to print to SmartVault
This is normally caused by SmartVault having never been integrated in the environment or the Access Confirmation screens from the tax software being told to deny access instead of grant. See this section for instructions on integrating.
If the boxes were already checked, uncheck the box to integrate and select OK before going back to SmartVault User Settings to recheck the integration box.
This app has been blocked by your system administrator
If you were logged in to your hosted environment at the time the program was being installed, you'll receive an error when you open SmartVault:
"This app has been blocked by your system administrator. Contact your system administrator for more info."
You'll need to log off appropriately. Use the red Logoff button to sign out of the hosted environment. If you are missing this icon, right-click on the Start/Windows icon, select Shut down or sign out and choose Sign out.
