![]() Intuit Practice Management is now supported by Karbon. For support, see here or reach out to support@karbonhq.com
Intuit Practice Management is now supported by Karbon. For support, see here or reach out to support@karbonhq.com
Work efficiently, collaborate with staff, and deliver exceptional client experiences with Intuit Practice Management powered by Karbon.
This offering is available for Lacerte Tax or ProConnect Tax users.
Before you start:
It's very important to make sure you have a clean client list in your tax software before you start integration with Intuit Practice Management. These instructions will help you clean up your client list so your integration is successful:
How to clean up your client list in Lacerte:
If you have clients on your client list that you no longer prepare tax returns for, and used Intuit Link for it, is recommended to mark these clients inactive in Intuit Link. This will hide them from your client list and streamline your integration with Intuit Practice Management.
To mark a client inactive in Intuit Link:
- Sign in to Intuit Link.
- Select the gear in the top-right corner.
- Choose Manage Clients.
- Locate the client you wish to make inactive.
- Select the Mark as Inactive action.
If there are any clients that you don't want to show in Intuit Practice Management you'll want to remove those clients from your Lacerte client list. It's recommended that before you delete a client you make a backup. See Backing up client files in Lacerte for details.
To delete a client you no longer need in Lacerte:
- Select the client from the Client List.
- From the client menu choose Delete.
Review your client for missing information:
To sync with Intuit Practice Management each client needs to have:
- Individual Clients: First Name, Last Name, Social Security number.
- Business Clients: Business Name, Employer Identification Number.
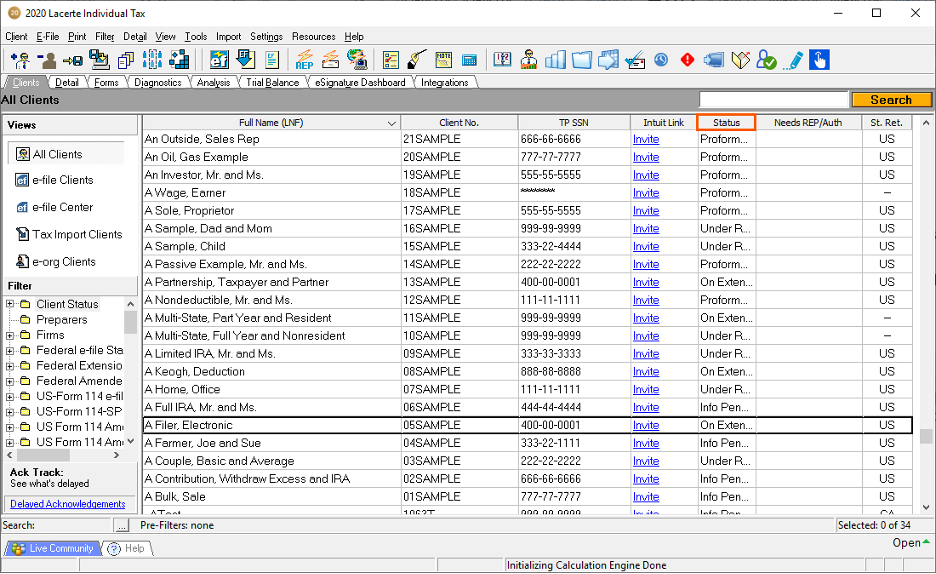
Update your Lacerte return Status:
When connecting to Intuit Practice Management, there's a tax mapping for the Status of the return. If the Status in Lacerte isn't updated, this will cause tax Work items to be created with the wrong Status.
For example, if all returns are in a Status of Proforma’d, but were actually e-filed, when the Work item is created in Intuit Practice Management it will come in as a Planned or Ready to start Status instead of Completed.
Refer to this article for instructions on changing the client status in Lacerte.
Ensure your tax software is up to date:
From the Tools menu choose Lacerte Updates.
Check that your Data path and System file path are correct:
The Data path for each tax module and System file path need to be the same on everyone’s computer. To update:
- From the Help menu, select TroubleShoot to open the Technical Support Information window.
- You may also open this by pressing F10 on your keyboard.
- Go to the System Information tab and check that:
- All users are on the same Data path and System file path.
- The Data path and System file path are both correct for each tax module. If they aren't, correct them:
- To change the Data path, use the steps in this article.
- To change the System file path:
- From the Settings menu, select System File Path and choose Change.
- Select Browse.
- Locate the correct System file path.
- Click OK.
- Click OK again to set the new System file path.
Preparing Lacerte 19 and 20 before connecting with Intuit Practice Management
After cleaning up the client list, you'll need to be logged in as the Primary Admin for Lacerte to walk through the three steps to:
- Set up your Settings,
- Prepare the database, and
- Connect to Intuit Practice Management.
It's recommended to edit your Lacerte tax-branded templates in Intuit Practice Management first before connecting. Work items are auto-generated once connected (based off each tax module you use).
To start the preparation process:
- Sign in to Lacerte as the Primary Admin.
- Go to the Integrations tab.
- This will take you to a screen with steps for connecting to Intuit Practice Management.
- Click each step below for instructions for that specific step (for example, Step 1, Step 2, Step 3).
Step 1 - Settings
- Select the Settings button under Step 1.
- Review the data shared under each section:
- Client information
- Tax module
- Password-protected clients
- Locked clients
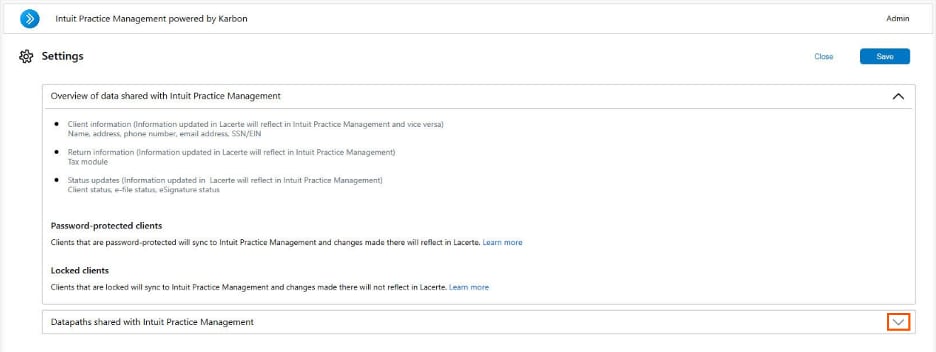
- Select the down arrow next to Datapaths shared with Intuit Practice Management to expand this section.
- Data paths will automatically populate for any tax modules that have been accessed.
- If this is a new installation or a new tax year, and the only module that has been accessed is Individual, exit the integration and open all of the tax modules installed. Once that's complete, start the integration again.
- Scroll through the list to make sure that all data paths are populated and that they're all located on the same drive.
- Click Browse and navigate to the correct drive location and update it, if necessary.
- After the data paths are correct, select Accept.
- The Make sure you have selected correct datapath for each module window will appear:
- If they're correct, select Continue.
- If the Data path is incorrect, select Change datapath.
- The data paths can't be changed without completing the entire integration process again, so please make sure they're correct.
- The Saving configured datapath(s) box showing the data paths that are being saved/configured will pop-up, the Estimated Time Left on this box will depend on the computer hardware, internet connection speed, server connection, etc.
- Select Close on the Datapath(s) saved successfully pop-up.
- This will bring you back to the Let’s get started! steps. The Settings button will be green, and the Prepare button will be blue and accessible.
- If any of the data paths needed to be updated this message will appear: Your active datapath is different than configured datapath. If this happens:
- Close out of Lacerte.
- Log back in.
- Go back to the Integrations tab. The message will be gone and you'll be able to select Prepare.
Step 2 - Prepare
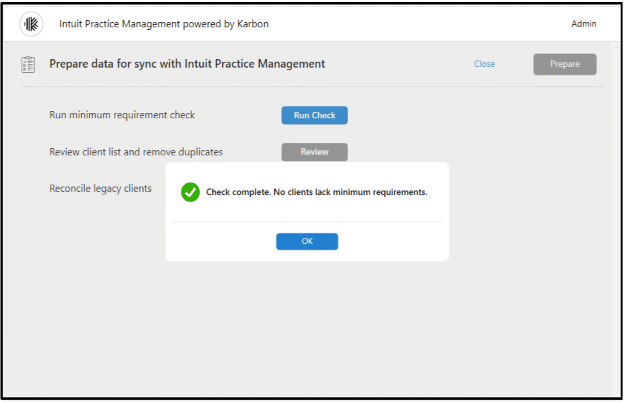
To prepare data for sync with Intuit Practice Management, you'll check for minimum requirements, review for duplicates and reconcile legacy clients. If, after clicking on each button, there's no missing information, duplicates, or legacy clients, a box appears indicating the check is complete. Click OK.
First, click the blue Prepare button. It will take you to this screen:
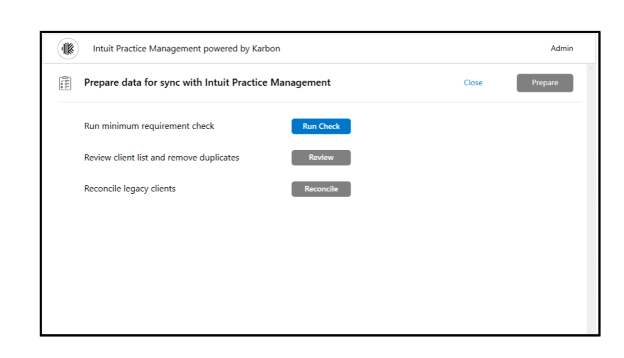
From there, do the following:
Part 1 - Run minimum requirement check
- Click the Run Check button.
- A list of clients will generate for each tax module showing a red dot with how many clients are missing information and the field(s) that are missing the required information. For example, below INDI1 is missing the SSN/EIN and INDI2 is missing the Name.
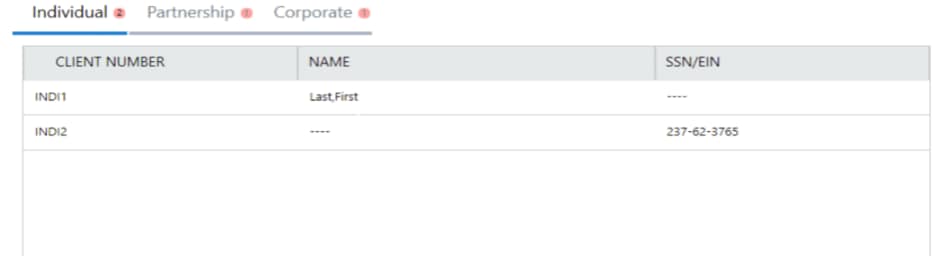
- Note the clients and do the following:
- Go to the client list of the respective module.
- Enter the missing data in Screen 1, Client Information.
- Once all the missing information has been entered, go to the Integrations tab.
- Under Step 2 select Prepare.
- Select Run Check again to ensure all clients pass the check.
- When all clients pass the minimum requirement check you'll receive a message stating Check complete. All clients fulfill minimum requirements for data sync.
- Click OK to continue.
- Proceed with the next set of instructions, Part 2.
Part 2 - Review client list and remove duplicates
You may have a client listed in Lacerte more than once for many reasons. This step will allow you to pick which client number you want to sync as the main contact in Intuit Practice Management.

- Select the Review button to begin.
- For each duplicate listed, select the Client Number for the information you want to be synced as the primary contact.
- Click Done when complete.
- Only one contact will sync to Intuit Practice Management, but both tax returns will come in as separate Work items.
- Proceed with the instructions for Part 3.
Part 3 - Reconcile legacy clients
Legacy clients are any clients that have been previously entered into an online portal (Intuit Link, ProConnect Tax Online, QuickBooks Online, etc.). This section will allow you to choose to sync those linked clients with Intuit Practice Management or not sync them.
If there are no Legacy clients, you'll come back to the Prepare data for sync with Intuit Practice Management screen. Select Prepare.
To reconcile legacy clients:
- Select Reconcile to begin.
- In the Lacerte Clients section, it'll show any clients currently in your Client List that may have duplicate information from another linked source for both Individual and Business. It's necessary to go through both sections.
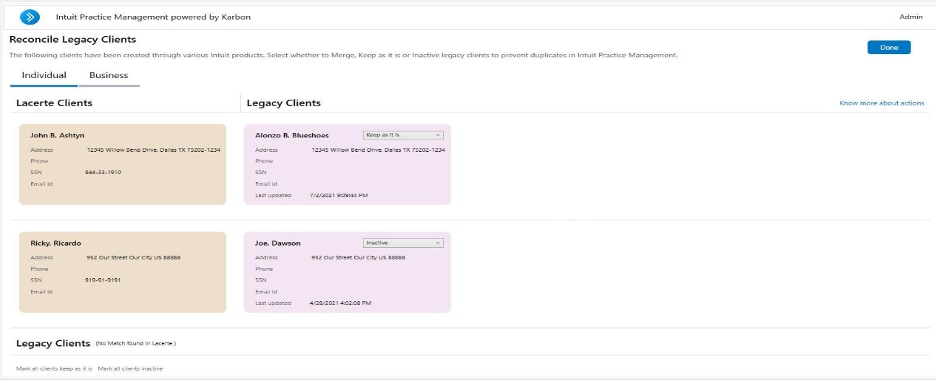
- Under the Legacy Clients column, use the dropdown menu for each contact card to choose what to do with the legacy information:
- Keep as it is: Both the Lacerte client information and the Legacy Client information will sync to Intuit Practice Management as two separate clients.
- Merge: The Legacy Client information will be merged with the Lacerte Client information and will only show once in Intuit Practice Management.
- Inactive: This will remove the Legacy Client information from the sync altogether.
- If the clients are active in QuickBooks Online Accountant and you select Inactive, QuickBooks Online Accountant will show these clients as inactive the next time they log in.
- In the Legacy Clients section, you'll see the client information found in synced accounts that isn't currently in your Lacerte Client List. Here you can:
- Mark all clients keep as it is to merge this information into Intuit Practice Management.
- Mark all clients inactive to prevent this information from showing in Intuit Practice Management.
- Set each client individually.
- Select Done when all legacy clients have been reviewed.
- Proceed with the steps below for Part 4.
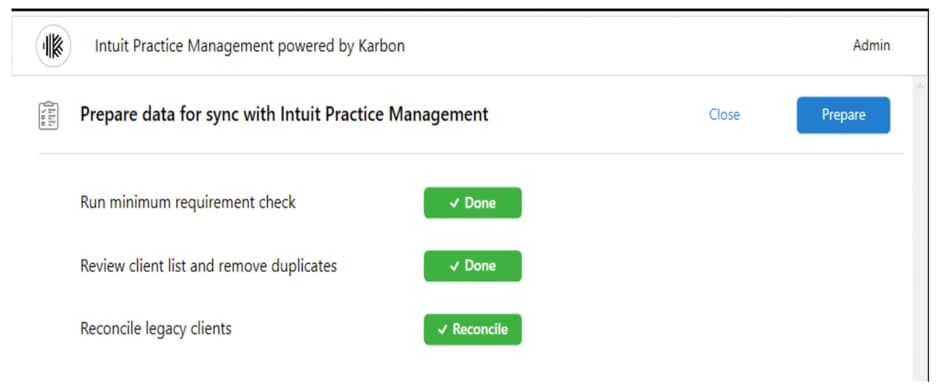
Part 4 - Preparation complete
When the minimum requirement check, duplicate review, and legacy client reconcilation are all complete, you'lll see this screen confirming that you're ready to proceed. Select Prepare to ready the data for sync.
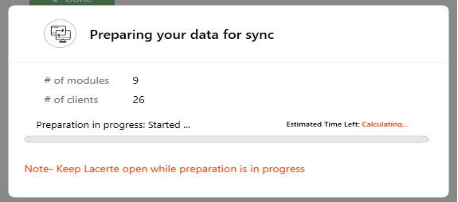
Once Prepare is selected, the Preparing your data for sync box will appear. Depending on the amount of data to sync, this may take a while.
Once all the above is complete you will be taken back to the Let’s get started! screen. Proceed with "Step 3 - Connect" below for more instructions.
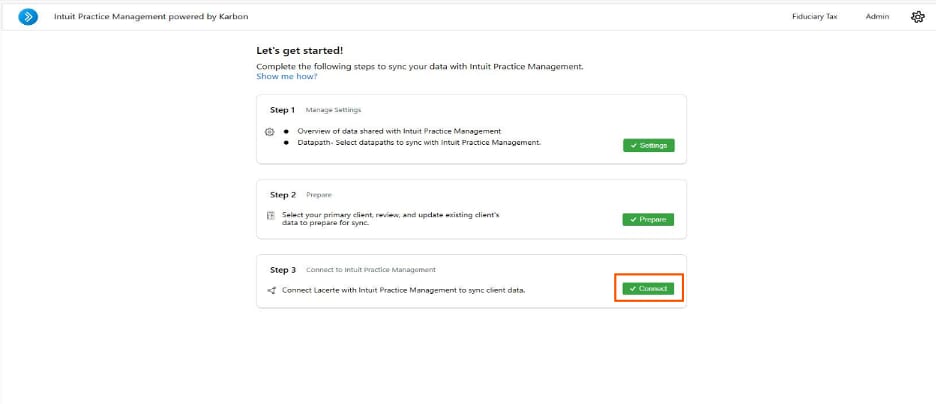
Step 3 - Connect
Once Step 1 and Step 2 are both complete, you will be taken back to the Let’s get started! screen. Select Connect.
Once Lacerte is connected, you'll be able to complete the steps in this article to sync your Lacerte data with Intuit Practice Management.