This article will help you import W-2s, 1099s, and other source documents into your client’s tax return using Intuit Link.
- You can view and import all supported documents in one place, even for taxpayers who don’t use Intuit Link.
- See here for more information.
How Intuit Link automatically imports documents
- You upload documents to your client’s return, or your client sends documents through Intuit Link.
- ProConnect Tax automatically identifies the document type and whether it can be imported.
- When you’re working in Input Return, you can view and import documents by clicking the lightning bolt on the right-hand side of your screen.
This lightning bolt icon will open the data import panel, where you can import, upload, download, delete, or ignore any importable documents. Or, click on the document's name to view it in a new tab.

When you go to an input that has documents available, the lightning bolt icon will bounce to draw your attention.
- For example, if your client uploaded a 1098-T, the icon will bounce when you open the Education/Tuition Credits (1098-T, 8863, 8917) screen.
How to import data using Intuit Link
- Go to the Input Return workspace.
- Click the Lightning bolt icon on the right side of your screen to open the data import panel.
- If the documents you wish to import aren't already listed, click Browse to choose files from your computer.
- If your client has already accepted a Link invitation this year, you’ll be able to switch between Upload and Intuit Link.
- The upload list will show documents added by your firm, and the Intuit Link list will display documents your client uploaded.
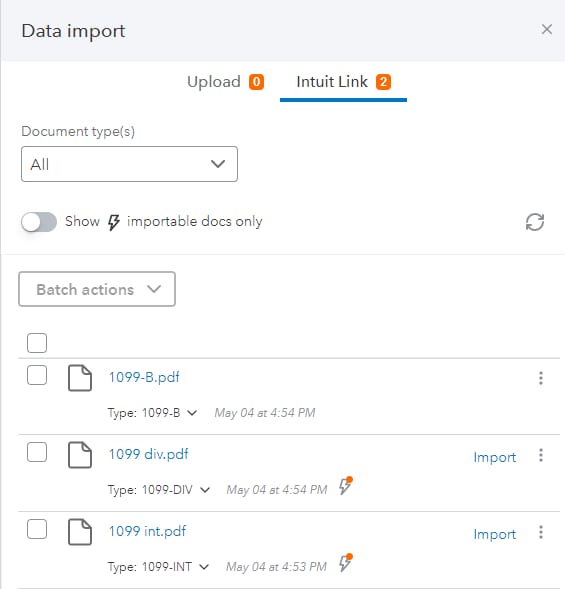
- ProConnect Tax will process the uploads and determine which documents can be imported.
- Locate the document and click Import.
- A document viewer will appear where you can review the source document and the information to be imported.
- If you've already entered information for this document type in the return, you'll be asked whether you wish to replace the existing input or create a new record.
- Once you're satisfied, click Import.
After importing:
- Input fields completed by data import will be highlighted in green so you can identify them.
- A lightning bolt will appear next to the document in the data import panel, indicating that the import is complete.
