- Mark as New
- Bookmark
- Subscribe
- Permalink
- Report Inappropriate Content
Help Articles
- Select the client and click Request from the eSig Status column.

Or after selecting the client , go to the E-File menu, point to Intuit eSignature, and click Request eSignature.
- Next the eSignature Forms window will appear and display the forms that will be included in the esignature envelope . Click Next to continue.
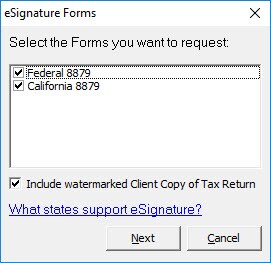
NOTE: A copy of the clients return is automatically included in every request initiated using this method. If you do not want to include a copy of the tax return, un-check Include watermarked Client Copy of Tax Return.
- The Documents screen displays the documents that will be included in the esignature envelope.
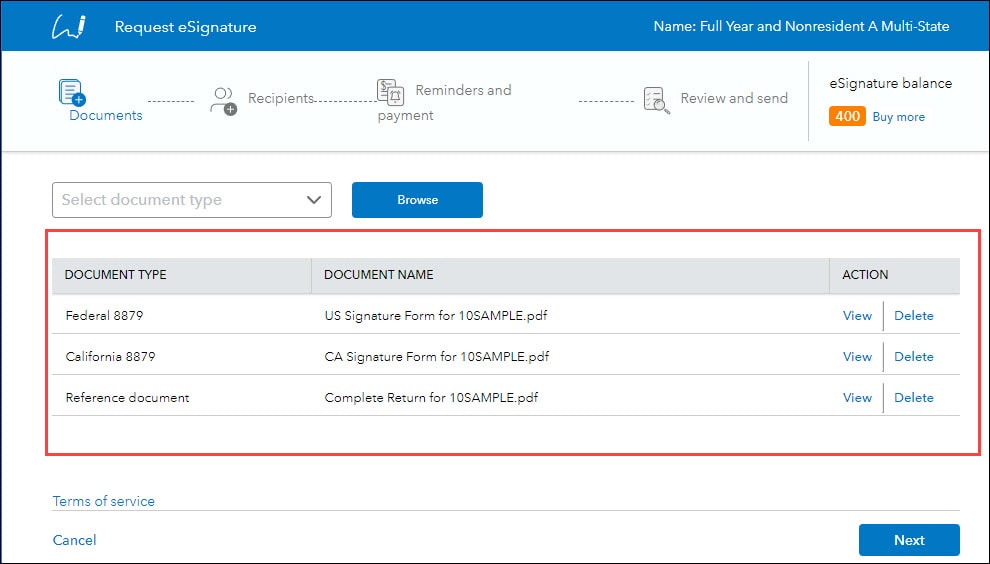
On the Actions column, click View view the PDF before sending it to the client or click Delete to remove any document from the envelope.
Add Additional Documents (Place Holder)
- Click Next.
- The Recipients section, display the Primary's Taxpayers name, E-mail address, and Authentication Method. (the taxpayer name and email address is pulled from screen 1 - Client Information)
On MFJ returns, the spouse's name and email a will be shown here too.
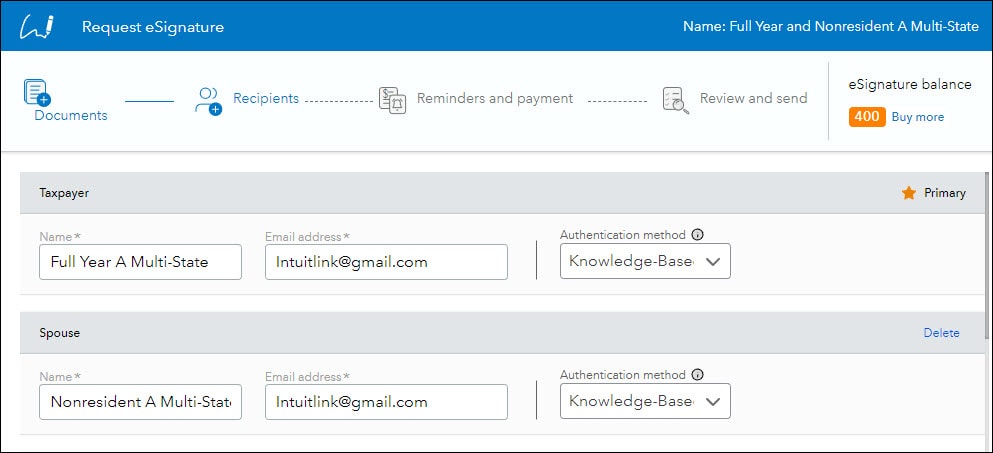
NOTE: When the Federal 8879 or state equivalent is automatically added to the envelope by the Lacerte program, the authentication method defaults to Knowledge-Base (KBA) and cannot be changed to any other authentication method. This is a IRS requirement and you can find more information here - Frequently Asked Questions for IRS e-file Signature Authorization.
- Next type your email message in the Email section or use the default text.
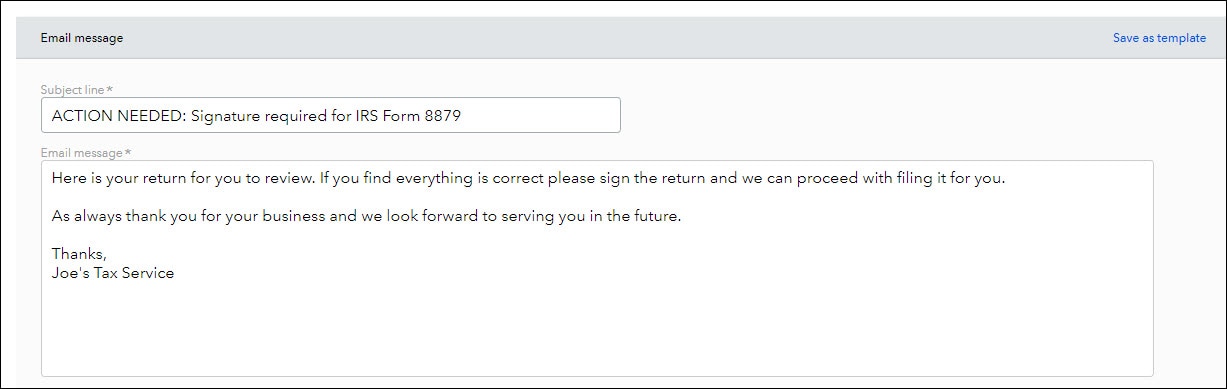
To save your email message for future requests, click Save as template. If you are on a network, other users on the network will see the same template.
- On the next screen is where you set your esignature reminder and expiration settings.
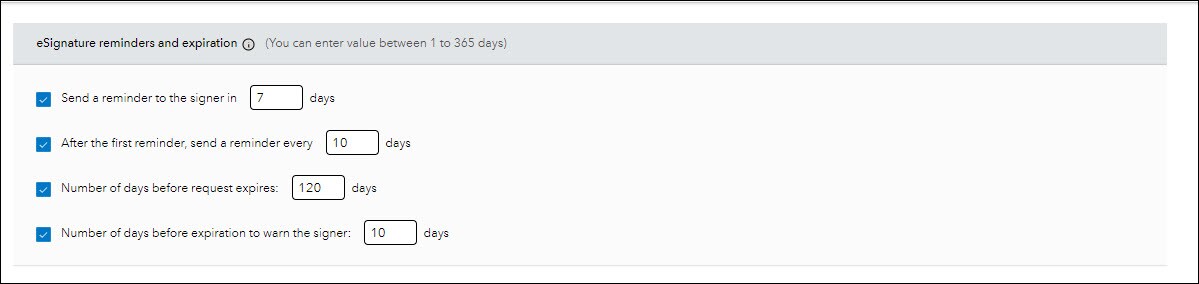
When you enable reminders, you specify when and how often to send notifications. The number of days before sending the first reminder should be less than the number of days before the request expires.
By default, requests expire 120 days after sending the envelope. You can modify this value as desired.
- If you are requesting payment with the esignature request, put a check in the Payment Request details checkbox.
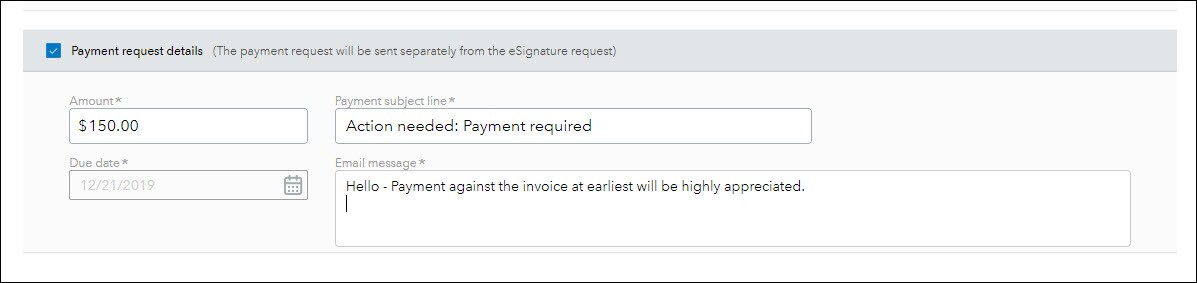
If the Use Amount Due Lacerte Invoicing is selected on in Client Payment Settings, the amount due on this screen will default to the amount on the Lacerte Invoice.
- The Summary screen shows the request details before sending. It shows all documents included in the envelope, recipient(s), reminders, and if applicable the payment details.
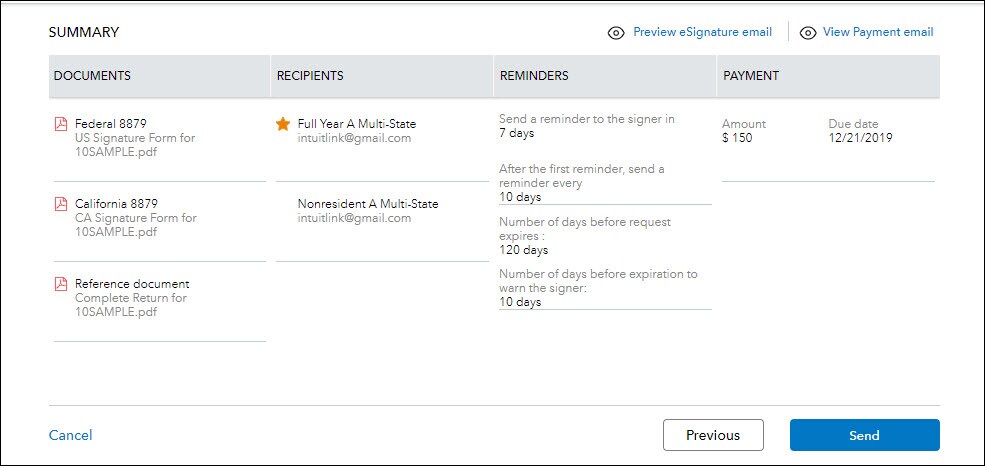
- If you are satisfied with the request details, click Send to sent the request to your client(s).
- After the request is sent, use the esignature dashboard to keep track of your esignature request.
