Removing old empty folders will result in a noticeable performance increase and decrease the size of the DMS Database.
At the beginning of each new tax season we release a new version of DMS. When you first go into this new version of the program it will prompt users to add the new tax year folder to the folder template for the upcoming tax year. After adding new tax year folders repeatedly over the years clients will be left with a considerable amount of empty folders that will never be used. These empty folders increase the size of the DMS database by as much as 40%. This size increase affects the performance of DMS. It is recommended to only keep the current tax year folder and the two prior tax year folders in the folder template.
Before You Begin:
- Ensure you are DMS version 18.1.4.
- To check your version of DMS, go Help and click About DMS.
- If you on a version older than 18.1.4, go to Tools and click Internet Updates to update your program.
- Ensure you have a current backup of your DMS Database.
- Ensure all users out of DMS.
- It is recommended to run DMS locally from the computer where the DMS database resides. Note: Network users will run DMS on the server.
Note: The following steps will not result in data loss. DMS will never delete a folder where files reside.
If at any point you encounter any database errors when completing the steps in this article, exit the program and run the DMS Database Maintenance - How to run DMS DBRepair.
Follow these steps to improve DMS performance by removing your old empty folders:
Step 1: Identify Tax Year Folders
Use the Archive feature to identify all prior Tax Year folders.
- Open DMS.
- Click on the File menu.
- Select Archive.
- Click No when prompted to run the Database Maintenance.
- Click the Collapse button.
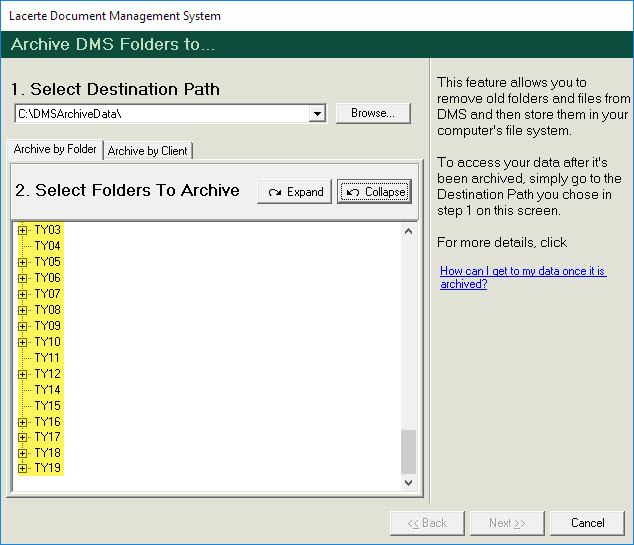
- Scroll down until you see the TY folders.
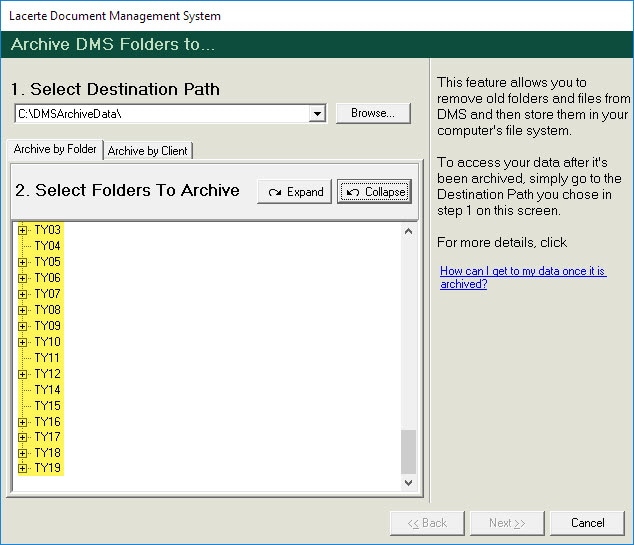
- Once you have noted how far back your list of tax year folders goes back you can, click Cancel to close this window.
Step 2: Add the Prior Tax Year Folders to your Folder Templates
- Click on Tools menu.
- Select Options.
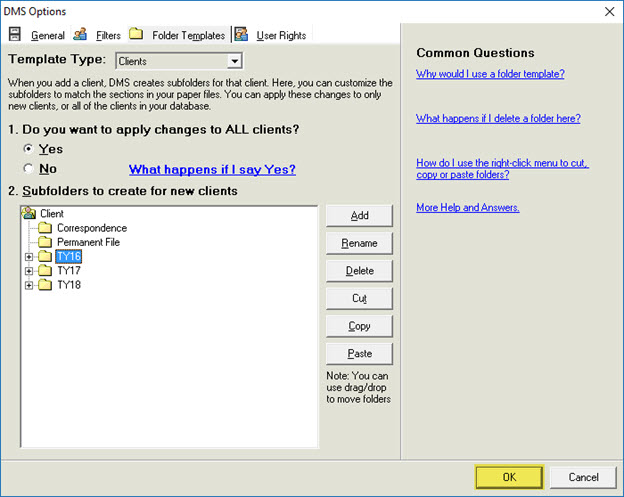
- Click the Folder Templates tab within the DMS Options window.
- Note the years listed in the template.
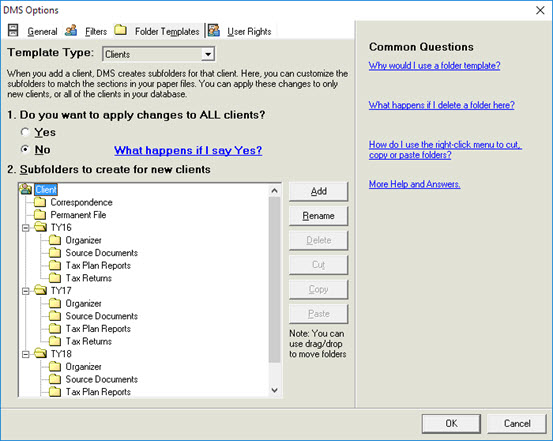
Example: In this image we have the current and two prior years which is the setting recommendation.
You will be adding TY folders to Folder Templates until it matches the list of TY folders in the archive window. Based on this example, you will need to add folders going back to TY03.
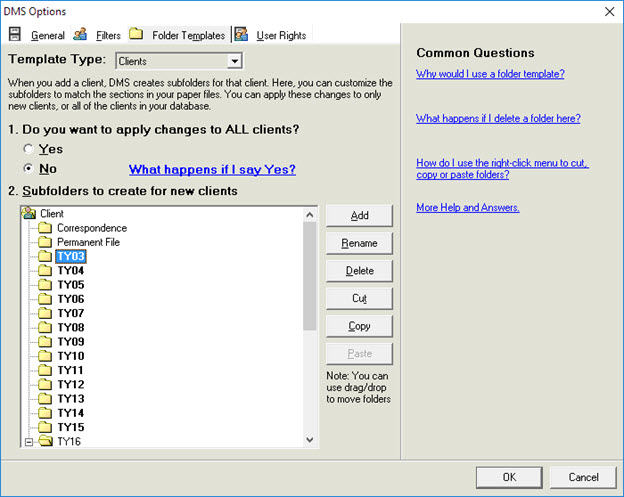
- Mark NO to Do you want to apply changes to ALL clients?.
- In the Subfolders to create for new clients, click the top item listed which is Client.
- Click the Add button, this will create a folder titled New Folder.
- Rename this folder to be the next TY folder that should be listed in your Folder Template.
Example: In this image we will name it TY15.
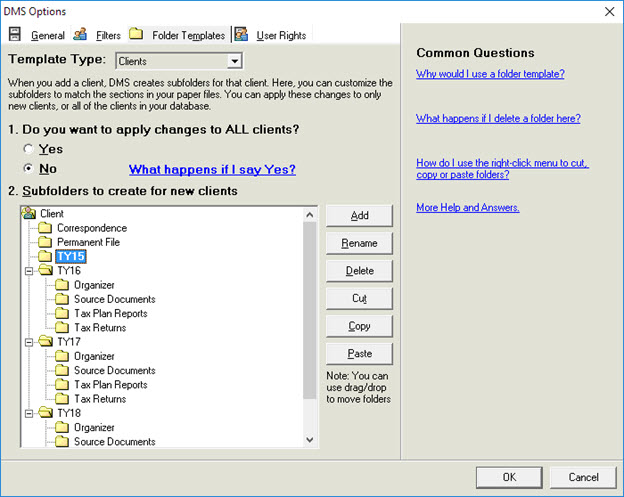
- Click on the top level folder named Client once again and repeat these steps until all of the folders needed match what is listed in the archive window.
Example: In this image we will add TY15 going back all the way to TY03.
Note: It is not necessary to add the subfolders to each TY folder. We only need the top level TY folders.
- Before clicking anything else, verify that Do you want to apply changes to ALL clients? is set to NO.
- Click OK.
The following dialogue box will be displayed.
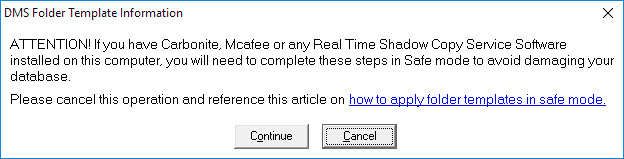
- Click Continue to add the folder templates.
Note: This process should go fairly fast. Once the window closes the process is complete.
Step 3: Remove Prior Tax Years Folders
- Click Continue to add the folder templates. Note: This process should go fairly fast. Once the window closes the process is complete.
- Click on Tools menu.
- Select Settings.
- Select Folder Template. This time verify Do you want to apply changes to ALL clients? is set to YES.
- Click on the oldest folder listed in the Folder Templates (In our example it is TY03).
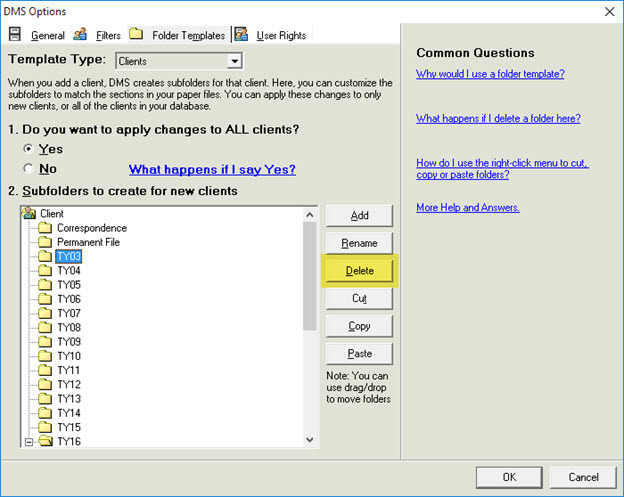
- Click the Delete button.
- The following dialog box will appear. Click Yes.
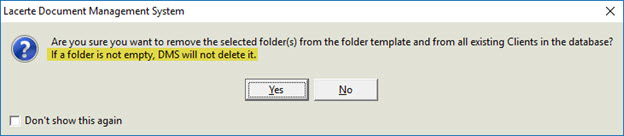
Note: It is important to note as the dialog box states DMS will not delete any folders if files exist inside of them.
- Continue removing prior year tax year folders until you are left with the current tax year and the two prior as shown below.
- Once you are finished removing folders click the OK button to continue.
The following dialogue box will be displayed.
- Click Continue and the folder removal process will begin. Note: Once you click Continue it will take a considerable amount of time.
- Once it completes it is important to run DBRepair to clean up the database. Performance improvement will not take place until after DBRepair has ran. Follow this link for directions to run DBRepair: DMS Database Maintenance
- Once DBRepair has completed all users can go back into the program.
Closing Notes
After following the steps provided an added step should be followed when creating the new tax year folder to the folder template.
The oldest tax year folder should be removed from the folder template. When this folder is removed please verify that Do you want to apply changes to ALL clients? is set to YES.
This will keep the DMS database from getting cluttered with empty folders moving forward.
