How to export data from EasyACCT
In EasyACCT, data can be exported into one of the following file formats: text, fixed-length, or comma-delimited (CSV). CSV is the preferred format.
- From the System Navigator menu, select EasyACCT Utilities and choose Import/Export Data.
- In the Name of Transfer Selection field, enter the name of the transfer selection.
- Select Export Data.
- In the Data Transfer Options and Type of Data to Transfer fields, select the type of data you'd like to export. The options are:
- General Ledger
- Account Records
- Vendor Records
- Transactions
- Employee/Payroll
- Employee Records
- Transactions
- Asset Depreciation
- Asset Records
- General Ledger
- In the File Format to Transfer field, select Comma Delimited.
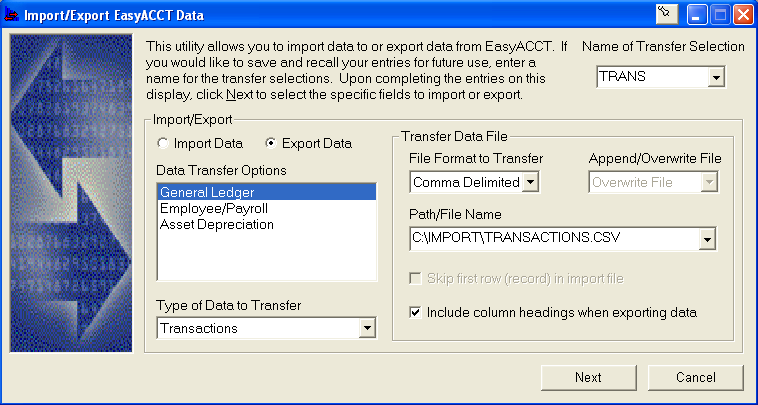
- Enter the Path/File Name of the CSV file you're creating.
- Be sure to include the file extension in this field (for example, C:\EASYW\DATA\GL.CSV).
- Check the box to Include column headings when exporting data.
- Click Next.
- On the Transfer Options tab, select any ranges to export (this tab may not be present based on the data being exported).
- Example: when exporting general ledger data, select a month and year.
- Switch to the Define Transfer Fields tab.
- For each row, enter a number in the Delimited Sequence column.
- You can't repeat numbers, so it's easiest to number sequentially all the way down the column.
- For example, in the screenshot below, the Reference Number category has a delimited sequence of 1, and will be column A in the spreadsheet; Date has a delimited sequence of 2, so it'll become column B; and so on.
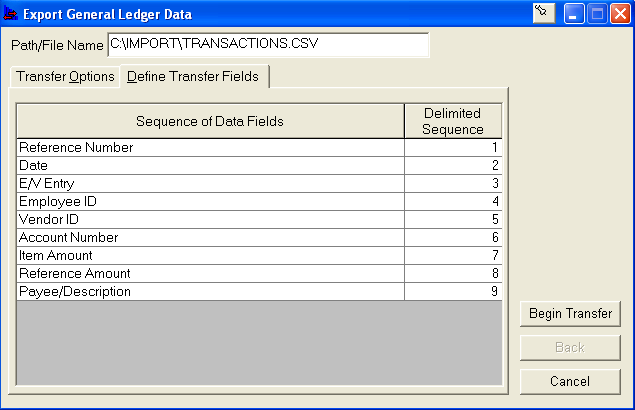
- Click Begin Transfer.
- When asked to save your settings:
- Answer Yes if you'll be exporting the data regularly.
- You can re-access the export settings without having to reenter everything (though you may need to change the date ranges).
- Answer No if this is a one-time export.
- Answer Yes if you'll be exporting the data regularly.
How to import data from EasyACCT
- From the System Navigator menu, select EasyACCT Utilities and choose Import/Export Data.
- In the Name of Transfer Selection field, enter the name of the transfer selection.
- Select Import Data.
- In the Data Transfer Options and Type of Data to Transfer fields, select the type of data you'd like to export. The options are:
- General Ledger
- Account Records
- Vendor Records
- Transactions
- Employee/Payroll
- Employee Records
- Transactions
- Asset Depreciation
- Asset Records
- Bank Reconciliation
- Bank Records
- Book Records
- General Ledger
- In the File Format to Transfer field, select Comma Delimited.
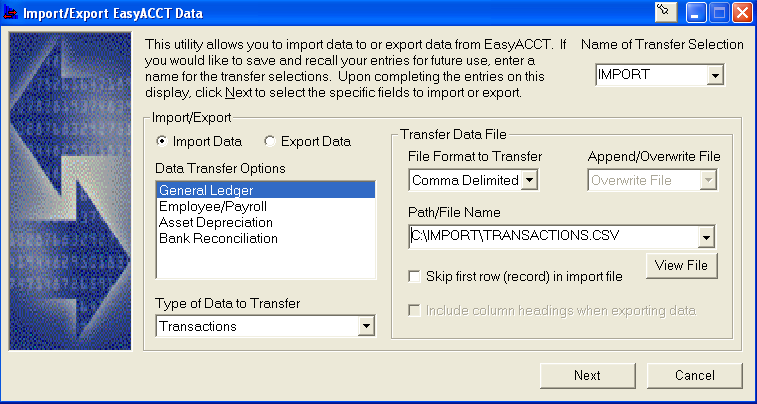
- If the first row is column headers, then check the box to skip it during import.
- Select to Append or Overwrite the file.
- For some options you can only overwrite and not append. If appending isn't an option for your import selection, it'll be unavailable.
- Enter the Path/File Name of the CSV file you are importing from.
- Be sure to include the file extension in this field (for example, C:\EASYW\DATA\GL.CSV).
- If the file is in XLS or XLSX format, open the file and choose Save As. For the type, select CSV.
- Click Next.
- On the Transfer Options tab, select any ranges to import (this tab may not be present based on the data being imported).
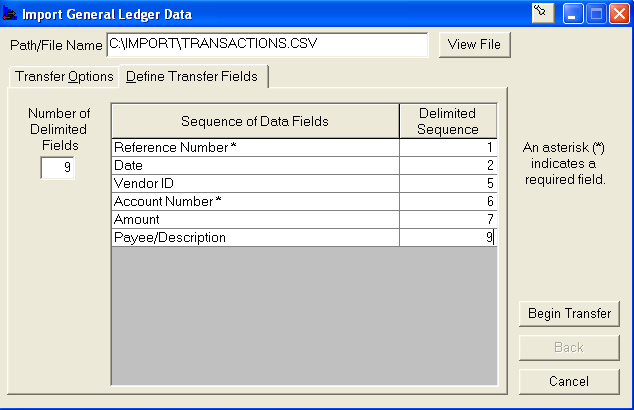
- Switch to the Define Transfer Fields tab.
- Enter the total number of delimited fields.
- The number of delimited fields is equal to the number of columns in the spreadsheet with information (regardless of whether you import them all).
- For each row, enter a number in the Delimited Sequence column.
- You can't repeat numbers, so it's easiest to number sequentially all the way down the column.
- For example, in the screenshot below, the Reference Number is in Column A of the spreadsheet, so it should have a delimited sequence of 1; the Date is in column B so it should have a delimited sequence of 2 to become column B; and so on.
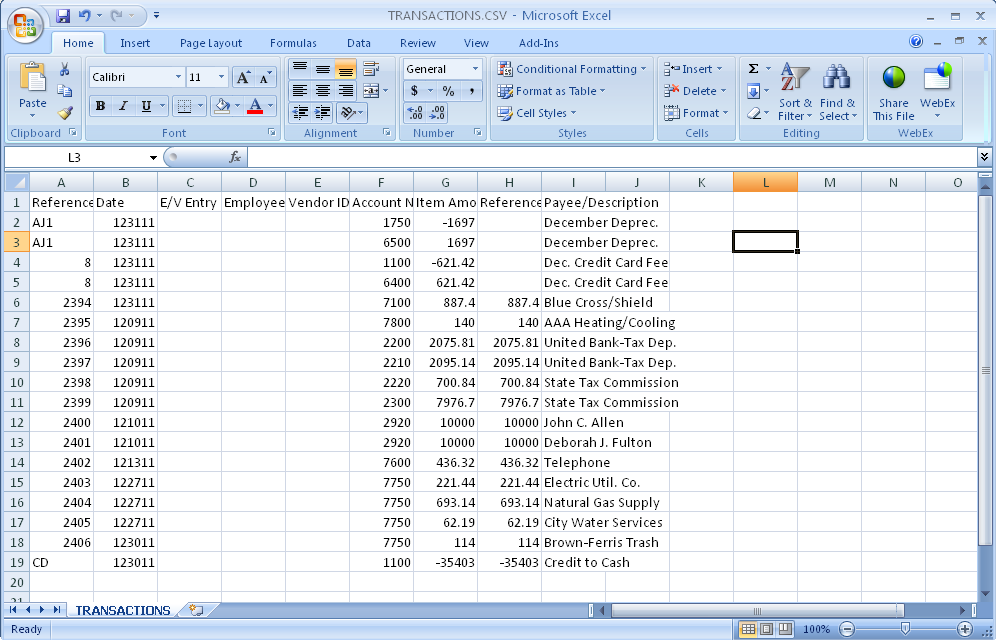
- The numbering scheme includes columns that aren't imported, so if you skip a column, don't forget to increment the delimited sequence.
- For example, if you choose not to import column C & D (the 3rd and 4th columns), the next delimited sequence would be column E (or delimited sequence 5).
- For example, if you choose not to import column C & D (the 3rd and 4th columns), the next delimited sequence would be column E (or delimited sequence 5).
- Click Begin Transfer when finished.
- When asked to save your settings:
- Answer Yes if you'll be importing the data regularly.
- You can re-access the import settings without having to reenter everything (though you may need to change the date ranges).
- Answer No if this is a one-time import.
- Answer Yes if you'll be importing the data regularly.
How to troubleshoot
If the date field doesn't import, or causes the import to fail, make sure that the date is in the mmddyy format. To correct the format in Excel:
- Open the file in Excel.
- Highlight the column containing the dates.
- Right-click on the column and select Format > Cells > Custom.
- Enter 0#####
- Click OK.
- Save the file.
- Import the file into EasyACCT.
For instructions on importing or exporting data from fixed length files, refer to the program Help files.
- Click Help > Contents and Index.
- Switch to the Index tab, type import, and press enter.
- Select Example 2 - Importing Assets (text).
- There are also help topics with information on importing ASCII files.
- You can save the transfer settings and selections and copy them using the Company Wizard.
- If exporting reports or financial statements to a file, instead of using the export feature, print the report to screen and click Save.
- The system creates an ASCII file located in the directory where the data is located. It can then be imported into a word processor program.
